Many professionals find that a clean desk can still feel cluttered. The author worked with Bobby Barton of Heartwood Renovations to design a built-in solution that hides cords while placing a desk in the center of the room.
Their home office pairs a 13-inch MacBook with a large curved screen to form an efficient setup. Even so, exposed power cords on the floor broke the polished look.
Good cable management starts in the design phase. People often forget to plan the path from device to outlet, so even careful tidying leaves visible cable runs and visual clutter.
Proper management hides every cord from the main viewpoint. That simple shift turned a room that felt like piles and boxes into a calm, professional workspace that supports focus and daily work.
Understanding Why Your Workspace Still Looks Messy
Even a tidy surface can feel chaotic when wires and power adapters remain visible beneath the workspace. Small, exposed runs create a constant visual pull that undermines focus and calm.
The Psychology of Visual Clutter
Clutter triggers a stress response. When people see tangled lines under a desk, attention fragments and productivity drops.
Dust also gathers faster around loose wiring, which can make devices overheat or fail. A large monitor, keyboard, and extra devices need more than a single power strip to stay neat.
“You cannot organize what you cannot identify,” the author notes, highlighting the need to sort before hiding.
Common Mistakes in Cable Hiding
A few errors keep a workspace feeling disordered: failing to group cords by type, underestimating the time needed to run power, and ignoring trip hazards around standing areas.
- Group power, USB, and monitor runs for easier maintenance.
- Label cords during the initial sort to speed future changes.
- Plan routes so plugs and adapters don’t create a tripping risk in a home office.
Good management reduces visual noise and makes the area feel calm. Investing a little time up front saves more time later and protects equipment from dust and heat.
Assessing Your Current Desk Layout
Stand in the doorway and study the room as a visitor; that view reveals the lines that pull the eye. From that spot, trace where cords run and note any open paths that break the visual flow of the workspace.
Test your monitor position before you commit to a permanent arrangement. Move the screen, keyboard, and mouse until the height and distance feel comfortable and allow for simple cable routing to a nearby outlet or built-in cabinet.
Consider the author’s built-in cabinet that houses a printer and bulky equipment. That kind of furniture hides power and keeps devices off the top surface, improving desk cable management and overall organization in a home office.
- View the area from the entry to identify visible cable paths and marks.
- Visualize each wire route before attaching clips or drilling grommets.
- Decide which power outlets you’ll use and whether a trash can or side bin can mask unsightly items.
- Leave some empty surface space so a large screen, keyboard, and mouse don’t create clutter.
After this assessment, the next step is to plan routes and choose the right tools to keep cords secure and out of sight. Small changes here prevent bigger problems at the productively used edges of your room.
Strategic Planning for Cable Management
Good cable management begins by imagining every wire’s path before you attach a clip or drill a hole. Planning first keeps the workspace intentional and prevents ad hoc fixes that create visual noise.
Visualizing Your Cable Paths
She chose a wall outlet to the side of the desk, furthest from the door, to create a “sneaky” route for power. That choice makes most cords invisible from the entry to the room.
Look under the desktop and along the legs to spot natural hiding lines. Test the monitor position and move it until both ergonomics and routing feel right.
The author used a wooden document tray to corral a laptop and hide the small bit of wire tucked beneath it. If one side stays open by preference, a short cord may show, but it can be kept minor.
- Decide where each cable should travel so it stays out of sight.
- Route leads along the back edge or behind a monitor arm when possible.
- Create a small station to keep the laptop accessible without adding clutter.
Essential Tools for Taming Messy Desk Cables
With the right supplies on hand, transforming a jumbled setup becomes fast and repeatable. The author relied on a handful of reliable tools to turn cord chaos into a clean, functional workspace.
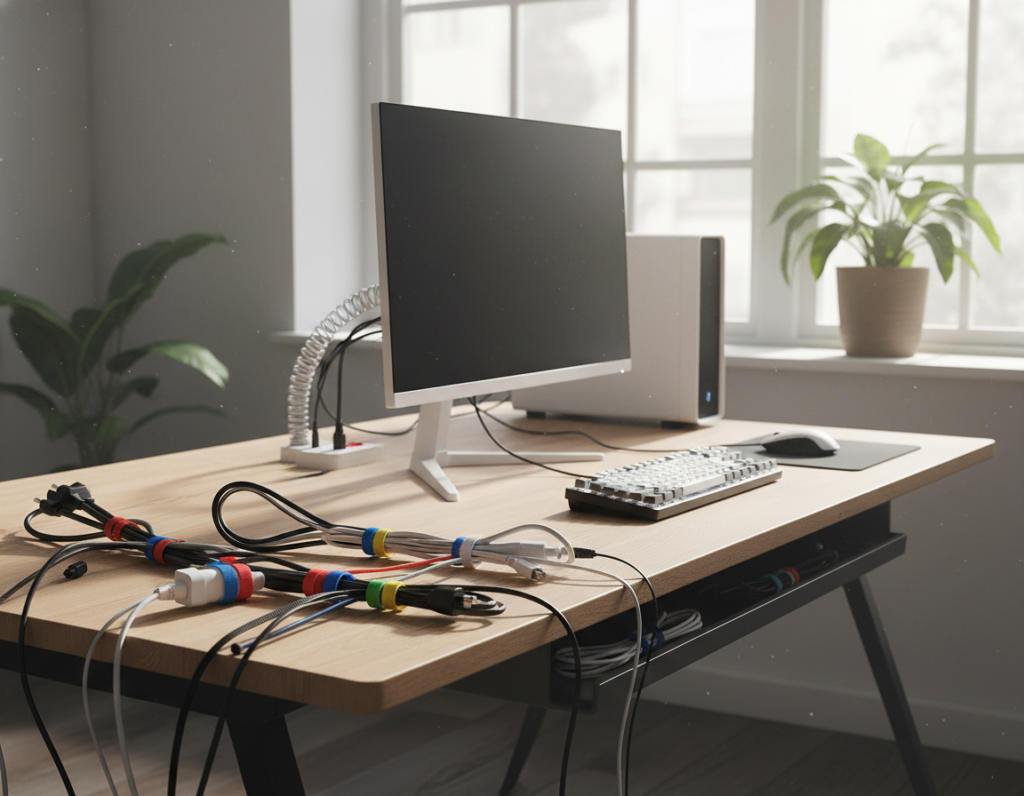
Selecting the Right Ties
Zip ties and Velcro both have roles. Zip ties give a permanent, low-profile hold for long runs. The author used zip tie mounts under the lip of her desk to keep grouped lines snug and out of sight.
Velcro ties are reusable and ideal when devices change often. They let the author add or remove gear without cutting anything.
Adhesive Clips for Precision
Adhesive clips lock individual cords along edges and prevent drops behind furniture. Place clips near plugs and at turning points so each cable stays put.
“Adhesive mounts stopped the slow slide that created the worst visual pull,” the author wrote.
Cable Sleeves for Bundling
Cable sleeves wrap several cords into a single smooth bundle. They are especially useful for standing setups with vertical runs.
- Use sleeves to make many lines look like one clean wire.
- Keep a small tray on the surface for chargers and accessories; it hides leftover cord ends.
- Measure power strip length first to avoid excess cord that needs hiding.
Managing Power Strips and Adapters
Power strips and adapters frequently create the biggest visual knot under a work surface. Keeping them organized improves both safety and the room’s look.
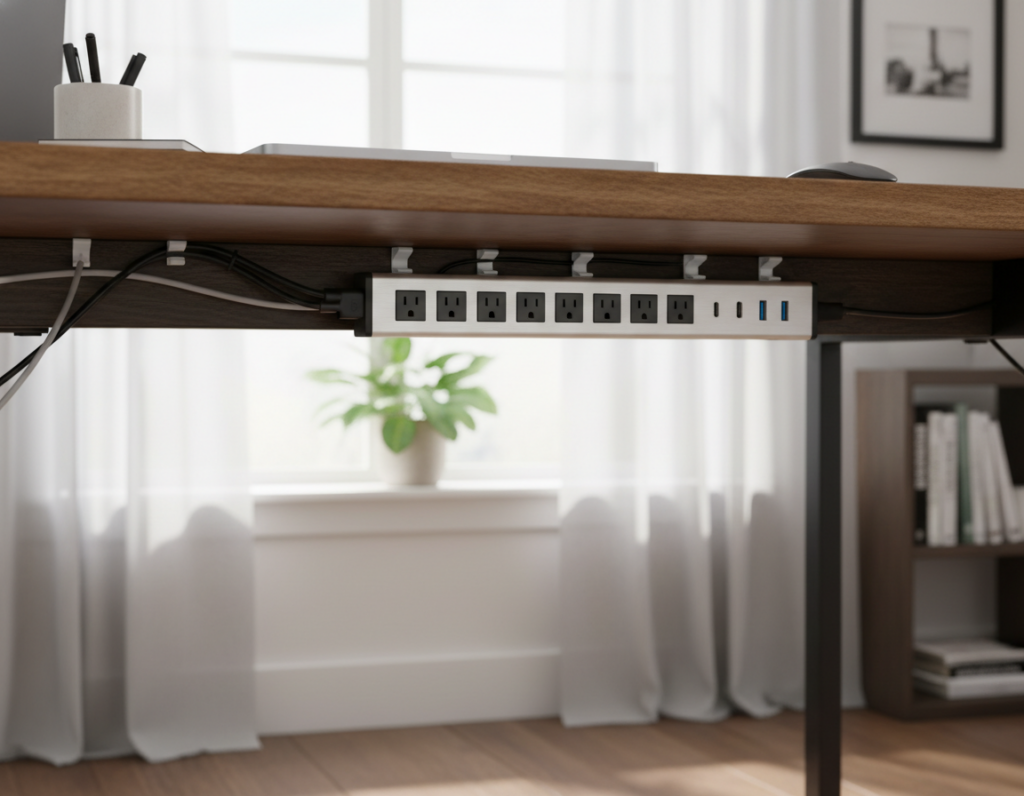
The author used double-sided tape to position a power strip where it stayed accessible below the desk. She preferred a mounted strip to one left on the floor because it reduced trips and dust build-up.
A cable management tray proved most effective for holding power strips, adapters, and long cords. The tray keeps airflow around a surge protector and hides bulky plugs behind a printer or inside cabinetry.
The carpenter relocated outlets into the unit and covered the old opening with a blank plate to keep the installation tidy.
- Mount strips under the surface with tape or a clamp tray to keep the floor clear.
- Keep chargers near their devices to shorten cable runs and simplify future changes.
- Secure power and adapters in a tray for better airflow, safety, and a cleaner office setup.
Routing Cables for a Clean Aesthetic
Tidy routing makes a workspace look intentional rather than improvised. Good routing hides distraction and makes the setup feel finished.
Securing Cables Along Desk Legs
Attach runs to the rear leg using larger zip ties so the cord hugs the post and stays out of sight from the main view. The author secured a main power lead tightly to the back leg to reduce movement and reflection.
Use adhesive clips or small grommets where a cord passes the edge of the surface. Grommets guide wires through the top into the underside and prevent pinching or twisting.
A slim raceway kit mounted along a wall or leg creates a neat channel to hide several cords together. For a low-profile floor transition, she cut a tiny slit in the rug at the base of the leg to feed the line to the wall.
“Black cording often blends better than white when seen from behind a leg,” the author observed.
- Bundle cables with a sleeve to form one smooth line down the leg.
- Prefer the shortest cords that reach comfortably to reduce excess material.
- Consider mounting strips or raceways to keep power and accessory cords hidden.
For more detailed methods on improving your setup, see the ultimate guide to cable management.
Utilizing Under Desk Storage Solutions
A tidy top surface still benefits from thoughtful storage under the work area to keep power gear out of sight. The carpenter planned cabinet depth for an old printer, but the new model rolls out easily and leaves room for a cable box and a small shelf.
Natural wood cable management boxes hide power strips and bulky adapters inside a container that matches furniture. The author used one to blend hardware with the room’s style.
The unpainted top shelf Dave added stores the router and modem. That vertical option frees floor space and keeps noisy devices accessible but out of sight.
“Under-desk trays held power strips without drilling and made cleanup simple,” the author noted.
- Use under-surface trays to lift power and shorten visible runs.
- Choose boxes sized for your devices and power strips to avoid crowding.
- Keep a small trash can to mask cords and small accessories at the side.
Good storage under the worktop makes long-term management easier. It turns a busy area into a calm, functional home office workspace.
Styling Your Desk Surface to Hide Remaining Clutter
The final step in a clean workspace is styling the surface so what remains looks intentional. A few well-chosen pieces make power runs and small cords fade into the background.
Using Trays to Corral Essentials
She uses a large tray to group a monitor base, a lamp, and everyday devices into one neat island. That single tray creates a focused display and keeps items from spreading across the surface.
Keeping about one-third of the work area bare gives breathing room for projects and prevents the view from feeling crowded. Trays also simplify cable management by keeping power and connectors routed to one place.
Ditching Original Packaging
Replace bulky boxes with pretty bowls or a footed china dish to hold scissors, staples, and tape. The author prefers small decorative trays for loose items and a drawer for basics that are not attractive or useful on display.
- Corral similar items in one tray to create order.
- Use decorative bowls for small supplies to make them a feature.
- Reserve a drawer for spare chargers and extras that don’t need to show.
Good styling finishes the setup: it hides what’s left and makes the workspace feel calm and purposeful.
Maintaining Your Organized Workspace
Maintaining order is less about big overhauls and more about simple, repeatable rituals. Small, regular checks keep cable management functioning and prevent gradual drift.
The author recommends a quick inspection every few weeks to ensure each cable is still secured and routed correctly. Once cords are wrangled and fastened, charging phones and other devices at the desk becomes faster and neater.
Regular attention also reduces dust build-up around power strips and adapters. That keeps equipment cooler and extends the life of printers, monitors, and other gear in a home office.
- Schedule brief reviews: spend ten minutes monthly to tighten mounts and tidy stray leads.
- Use a tray and clips: group charging points so swaps and upgrades go smoothly.
- Swap smartly: label power runs before changing keyboards or monitors to speed reconnection.
- Keep basic tools handy: Velcro, a small screwdriver, and spare zip ties save time and frustration.
“A little maintenance saves a lot of time,”
With a simple system, the author says ongoing organization feels effortless. A few tools and brief habits protect your workspace and make work more pleasant each day.
Troubleshooting Common Setup Challenges
Movement adds a new set of constraints: adjustable surfaces need cable routes that flex without tugging. Standing models can pull plugs or stress connectors when cords are too short or fixed in the wrong place.
Handling Standing Desk Movement
Plan for travel. Use extra-long cable runs so the monitor and devices never unplug at full height. Mount power strips beneath the work surface so power stays with the unit instead of trailing to the wall.
Secure moving parts: adhesive cable clips and Velcro ties keep cord groups attached to the frame so they rise and fall together. Zip ties and cable ties work for permanent runs; velcro ties provide flexibility when devices change.
- Route sleeves down a leg or along a support to keep cables together and off the floor.
- Avoid routing across support beams; plan routes that clear obstructions before fastening clips.
- Consider running a surge protector vertically up a straight leg if curves prevent tidy clips.
“Using longer cables and robust mounts solved the most common unplugging problems,”
For a checklist of common pitfalls and quick fixes, see this guide on desk cable management mistakes. Brands like iMovR also offer options tailored to moving desks for a polished, reliable setup.
Conclusion
A few simple habits and the right tools make any workspace feel complete. Planning routes, securing a power strip, and using a tray reduce visual noise and save time.
By minimizing, consolidating, and securing each cord, the author kept her home office looking professional and easy to maintain. These moves protect equipment and make the room calmer for daily work.
Small, regular checks prevent drift. With modest effort up front, anyone can reclaim their office and keep it productive for years.